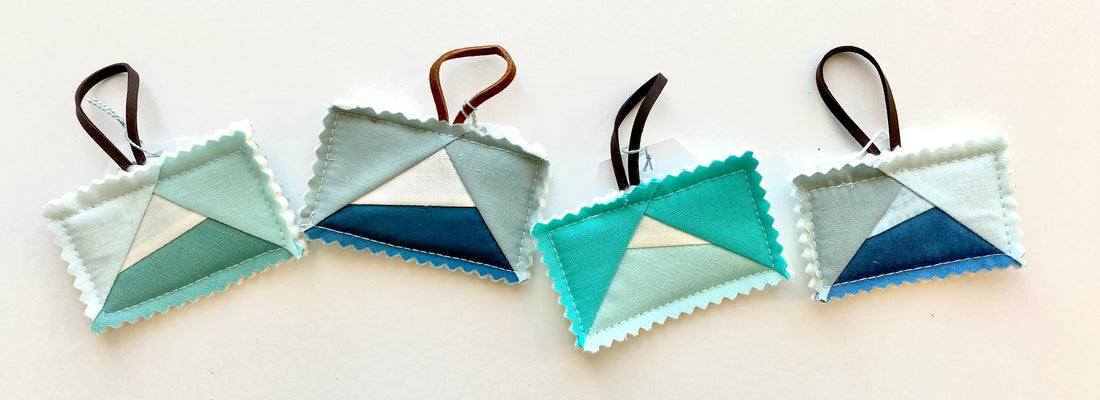
Supplies:
- Ruler
- Iron (optional, all seams can be finger pressed if desired)
- Piece of paper 3in x 2in
- Marking tool (for paper)
- Paper scissors
- Fabric scissors (or rotary cutter + mat)
- Pinking shears
- Piece of string/ribbon at desired length (I prefer 4.5-6 inches)
- 3in x 2in piece of batting
- 3in x 2in Fabric 1 (mountain base)
- 1.5in x 3in Fabric 2 (mountain top)
- 2.5in x 2.5in Fabric 3, cut in half diagonally (sky) (or to make scrappy, 2 pieces 1.5in x 2in)
- 3in x 2in Fabric 4 (backing)

Instructions:
- Mark a dot 0.25in from the top of the 3in side of piece of the paper, halfway across at 1.5in.
- Mark 2 dots on each edge of the paper 0.25in up from the bottom side.
- Using the ruler, draw a line connecting the top center dot to each bottom side dot.

-
Cut out the Mountain Template.

- Place Fabric 1 right-side-up. Position Fabric 2 right-side-down as desired on top of Fabric 1.
- Using a 1/8in seam, sew along the top edge of Fabric 2. Finger press or iron the seam however you like. I do not choose to trim the excess Fabric 1.

- Position the Mountain Template over the Fabric 1-2 as desired (making sure the Mountain Template is completely covered by fabric). Cut around the Mountain Template to create the Mountain.

- Place one of the Fabric 3 pieces right-side-up, with one of the angled sides of the Mountain aligned against the long side of Fabric 3. There should be more of Fabric 3 on the top side of the Mountain than the bottom. See Figure XYZ.
- Sew together, again with a 1/8in seam. Press (or finger press) the seam however you like (I press towards Fabric 3).


- Repeat Steps 9 and 10 for the other piece of Fabric 3.


- Layer in the following order: Fabric 4 right-side-down, batting, Mountain right-side-up.


- Use the pinking shears to trim just the top edge of the sandwiched Mountain Ornament.
- Fold the string in half and tuck it 1/4in down between the batting and Fabric 4.

-
Holding the string in position, sew along the perimeter of the Mountain Ornament at 1/4in from the sides.


- Use the pinking shears to trim the remaining 3 sides.

- Make some more! Share on Instagram with #


